- English
- Deutsch
- Español
- Français
- Italiano
- Português
PRTG can only discover devices that it can ping. Therefore, PRTG scans your network by pinging IP addresses in the subnet of your PRTG core server system and adds all reachable devices to your PRTG installation.
PRTG scans all network segments for devices using Ping (at group level only).
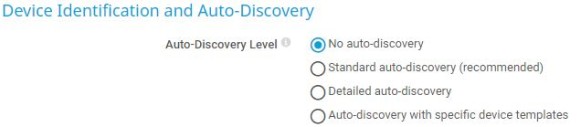
PRTG assesses the device type for all devices that it discovered during stage 1 (via SNMP, WMI, and other protocols).
PRTG creates sensor sets that match the discovered device types of stage 2. It does this based on built-in (or custom) device templates that include recommended sensors for many device types.
Get full visibility with real-time dashboards, alerts, and customizable sensors
You can run the auto-discovery just once, on demand via the context menu, or based on a schedule.
With schedules, you can run the auto-discovery at group level, for example, every day or every week to automatically create new devices when they are connected to the network and to add suitable sensors.
Note: Frequent auto-discoveries of large segments of your network might lead to performance issues. Therefore, we recommend that you schedule regular auto-discoveries only where necessary. For more information, see also the Knowledge Base: Why can automatic auto-discoveries evoke performance issues?
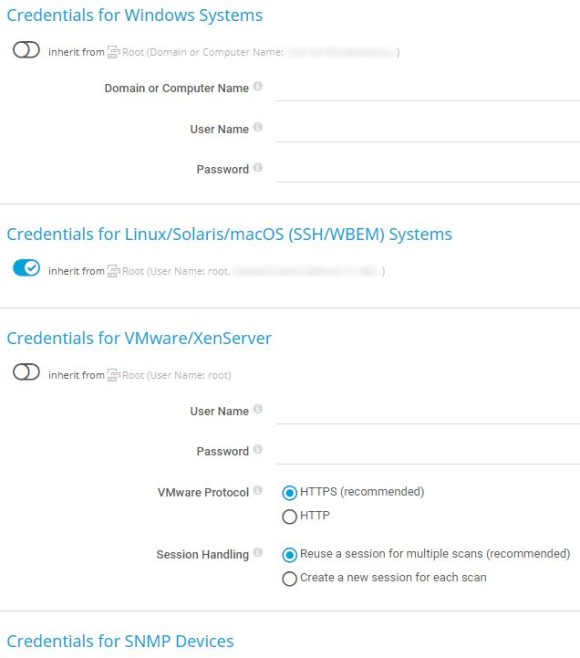
Set the credentials for access to your devices before you manually run an auto-discovery.
We recommend that you define the credentials at root group or probe level to make the best use of the inheritance of settings. This way, all monitoring objects underneath the root group or probe in the object hierarchy inherit the configured credentials.
You can disable the inheritance of settings at each level in the object hierarchy and set different credentials for groups or devices.
Take the following steps:
For detailed information on how to set up the different credentials, see, for example, the PRTG Manual: Probe Settings.

Adding an auto-discovery group is useful if you have a new network segment that you want to run the auto-discovery on. There are two ways to add an auto-discovery group:
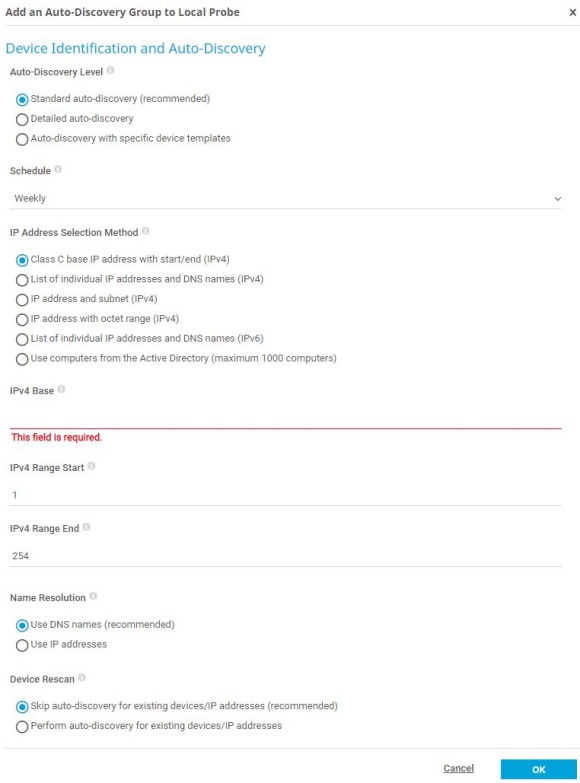
Proceed with the following steps:
Note: During the auto-discovery process, which runs in the background, you might experience a lower system performance. Also keep in mind that the auto-discovery might run for up to several days depending on the defined IP address ranges.
Custom alerts and data visualization let you quickly identify and prevent all kinds of issues
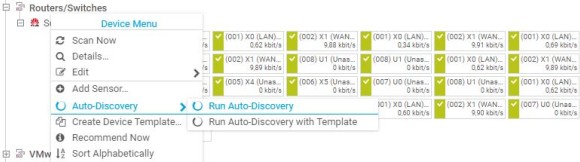
It is always possible to directly run an auto-discovery on a specific device.
To do so, right-click the respective device in the device tree and select Auto-Discovery | Run Auto-Discovery from the context menu.
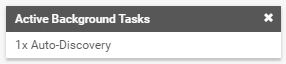
You can always view the status of the auto-discovery process as follows:


After the auto-discovery finished, review the devices and sensors that PRTG discovered and manually delete all double objects or objects that PRTG added unintentionally.
If any issues occur during an auto-discovery, check the log file CoreAutoDiscovery.log in the PRTG data directory under %programdata%\Paessler\PRTG Network Monitor\Logs\debug.
Here you can see, for example, the applied device templates, newly added sensors, as well as any errors that occurred.
Because the auto-discovery adds devices or sensors that you manually deleted from the device tree again, you can completely disable the auto-discovery for specific groups or devices. Take the following steps:
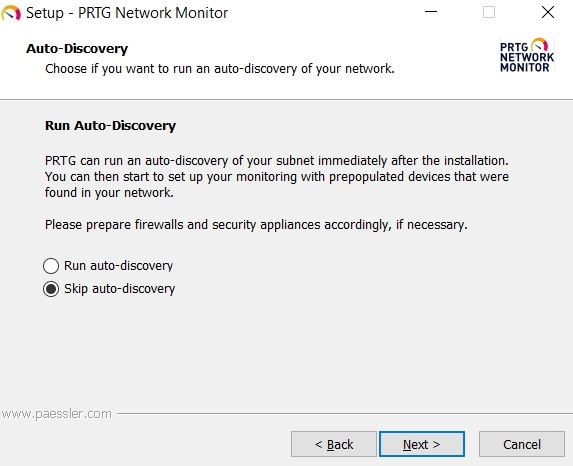
It is also possible to disable the initial auto-discovery for a new PRTG installation via the PRTG installer.
During the installation process, choose the Custom installation mode and select Skip auto-discovery in the according dialog.


